Guide
What Filament Actually Costs Per Print
This is the number that surprises people in a good way. Filament is sold by weight, your slicer tells you the weight before you print, and the rest is one division you can do in your head.
By Scooter M. · Published · Last reviewed
How this page is funded: the buy links below are affiliate links. If you buy through one we earn a commission, at no extra cost to you. It does not change the order of the picks or a word of what we say about them. Full disclosure.
Printers we claim to have tested: 0. Everyone in this category says they tested twenty machines. We have not tested any, and we would rather say so. What we did instead is on this page: the manufacturer’s own published specification for every pick, cited and dated; the arithmetic on what it costs to run, with the inputs shown; a live price rather than a remembered one; and a plain answer on who should skip each machine.
The short answer
Cost per print = spool price ÷ 1,000 × grams your slicer reports. That is the whole calculation. Filament comes in 1 kg spools, your slicer estimates the weight of every model before you print, and most useful desk-sized objects weigh tens of grams — which makes the answer, almost always, “less than you thought.”
Why we do not print a dollar figure here
Because filament prices move and any number written into an article goes stale. The live price is inside the buttons on this page, and the formula above works with whatever number you see there. That is deliberately more useful than a figure we would have to keep rewriting.
What things actually weigh
Your slicer is the authority for any specific model — it calculates the exact weight from the geometry and your settings before it sends the file. But it helps to have a sense of scale, and these are the rough bands you will keep meeting:
Approximate weight bands for common objects, as a rough guide only. Your slicer gives the exact figure for any specific model at your settings, and that is the number to use.
| Object | Rough weight band | Spools per 1 kg |
|---|---|---|
| A calibration Benchy | Under 15 g | Dozens |
| Cable clips, hooks, small brackets | 5 - 20 g each | Dozens |
| A phone stand | 20 - 50 g | 20 - 50 |
| A desk organizer | 80 - 200 g | 5 - 12 |
| A large decorative vase | 150 - 400 g | 2 - 6 |
| A full-size helmet, printed in parts | 500 g - 1 kg+ | 1 or fewer |
The pattern is worth internalizing: everyday useful objects — which is what most people print — are cheap enough that the cost per print is not a factor in whether to make something. That is a large part of why the hobby is enjoyable.
The two settings that change the number
Infill
How solid the inside of the object is, expressed as a percentage. Printers do not fill objects solid by default — they print a lattice, because a lattice is nearly as strong for a fraction of the material.
This is the setting beginners overspecify most. A decorative object is fine at fifteen percent. Going to fifty percent roughly triples the material in the interior and adds hours, for strength you will never test. Raise it for functional parts that take real load; leave it alone otherwise.
Walls and layer height
Wall count — how many perimeters the printer draws around the outside — contributes more to a part’s strength than infill does, and it is a smaller material cost. If you want a stronger part, add a wall before you add infill.
Layer height mostly trades print time against surface finish rather than material. A model printed at 0.2 mm and 0.3 mm layers uses similar plastic; the thicker one is quicker and slightly coarser.
The waste nobody mentions
- Supports. Scaffolding under overhangs, printed and thrown away. Orienting a model well is the cheapest way to avoid them.
- Brims and rafts. Material printed around or under a part to help it stick. Cheap, and worth it on a part that would otherwise lift.
- Purge on multi-color prints. The big one. Every color change flushes the old color out of the nozzle into a waste block, and a model that changes color frequently can waste a startling amount. The multi-color page covers this properly.
- Failed prints. The real waste in month one, and the argument for reading the bed adhesion page before you need it.
How this fits into the total cost
Filament is the recurring cost, electricity is nearly free, and the machine is the one-off. We put all three together, with the electricity arithmetic shown from published wattage and a cited national rate, on what your first month costs and how much a 3D printer costs.
What we would buy for this
Chosen from the same registry as our roundups, on the manufacturer’s own published figures and a live price.
Overture PLA
Overture · Your first spool, and your tenth
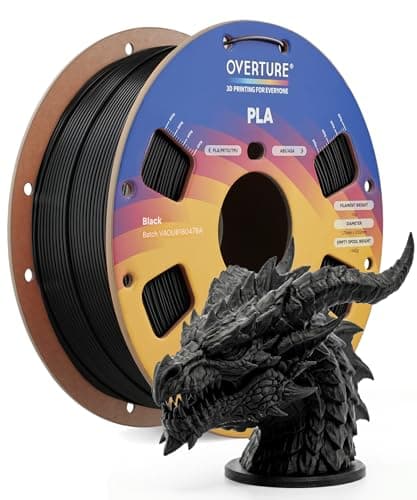
The default answer to 'what filament should I buy'. A tight published diameter tolerance, a conventional temperature range every printer profile already expects, and it is sold everywhere. Nothing about it is exciting, which is the point.
#ad Price as of October 19, 2026, from Amazon. Prices change. How we make money.
What it actually is
PLA is the plastic beginners should print. It is stiff, it needs no enclosure, it barely smells, and it sticks to a plate at low temperatures. This is a mainstream 1 kg spool of it.
What the manufacturer states
| Figure | Value | Source |
|---|---|---|
| Diameter | 1.75 mm | Overture published product specification |
| Dimensional accuracy | +/- 0.02 mm | Overture published product specification |
| Spool weight | 1 kg (2.2 lb) | Overture published product specification |
| Recommended nozzle temperature | 190 - 220 C | Overture published product specification |
| Recommended bed temperature | 25 - 60 C | Overture published product specification |
| Packaging | Dried before packing and vacuum sealed | Overture published product specification |
Read from Overture, PLA filament product page on 2026-09-01. Where a manufacturer does not publish a figure, there is no row for it here.
What is good about it
- +/- 0.02 mm published tolerance, which is as tight as mainstream PLA is quoted
- 190 - 220 C is squarely inside every stock PLA profile you will meet
- A 25 - 60 C bed range means it will stick even on an unheated or barely warm plate
- Vacuum sealed with desiccant, so a spool bought in advance is still dry when it arrives
What is not
- PLA softens in a hot car or a sunny window — this is a property of the material, not the brand
- Not the cheapest per kilogram once you start printing seriously
- Color consistency between batches of any budget filament is a real thing
- No filament is a fix for a machine that is not leveled
Skip this one if
Skip it if the part you are making will live outdoors or in a car. That is a PETG job, not a PLA one, and no PLA brand changes that.
What we cannot tell you
We have not printed this filament. Batch-to-batch color consistency and how it behaves after a year in a cupboard are things only repeated use reveals.
How it scored for a beginner
- Ease for a beginner9.5
- Published tolerance9.5
- Availability9.5
- Value per kilogram8.0
Beginner fit 9.0 / 10. That is our editorial read of how well this suits someone buying their first printer, taken off the published specifications — not a test result, and not a verdict on absolute quality. It is deliberately not marked up as a rating in this page’s structured data. How we pick.
HATCHBOX PLA
HATCHBOX · An older or slower printer
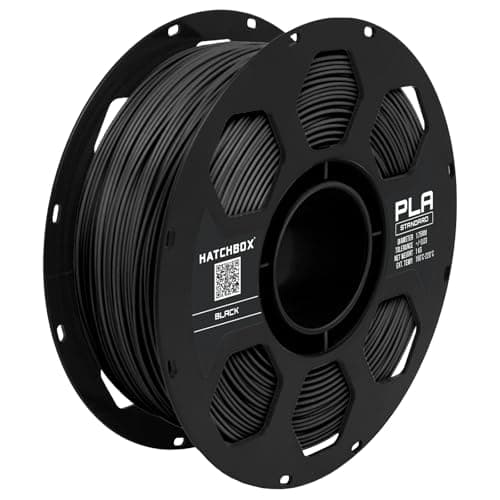
The long-standing default in a lot of American workshops. A slightly looser published tolerance than Overture and a lower quoted temperature window, which suits older printers with modest hot ends.
#ad Price as of October 19, 2026, from Amazon. Prices change. How we make money.
What it actually is
A 1 kg spool of standard PLA from one of the brands that has been on this shelf the longest. It arrives vacuum sealed with desiccant.
What the manufacturer states
| Figure | Value | Source |
|---|---|---|
| Diameter | 1.75 mm | HATCHBOX published product specification |
| Dimensional accuracy | +/- 0.03 mm | HATCHBOX published product specification |
| Spool weight | 1 kg | HATCHBOX published product specification |
| Recommended extrusion temperature | 180 - 210 C | HATCHBOX published product specification |
| Packaging | Vacuum sealed with desiccant | HATCHBOX published product specification |
Read from HATCHBOX, PLA filament product specification on 2026-09-01. Where a manufacturer does not publish a figure, there is no row for it here.
What is good about it
- A 180 - 210 C window suits printers whose hot ends are not happy running hot
- Vacuum sealed with desiccant, so it survives sitting in a cupboard before you get to it
- Very widely stocked in the United States, in a lot of colors
- A known quantity — a great many printer profiles were originally tuned on it
What is not
- +/- 0.03 mm published tolerance is looser than Overture's quoted +/- 0.02 mm
- The quoted temperature ceiling of 210 C is low if you are chasing layer strength
- Not aimed at the very high speeds current machines advertise
- Nothing here is better than the alternatives; it is equivalent and familiar
Skip this one if
Skip it if your printer is a current fast machine and you want to use its speed. The published temperature range is conservative for that, and a filament sold as high-speed PLA is a better match.
What we cannot tell you
We have not printed this filament. Whether the conservative published temperature range is a limit in practice is a test we have not run.
How it scored for a beginner
- Ease for a beginner9.0
- Published tolerance8.0
- Availability9.5
- Value per kilogram8.0
Beginner fit 8.4 / 10. That is our editorial read of how well this suits someone buying their first printer, taken off the published specifications — not a test result, and not a verdict on absolute quality. It is deliberately not marked up as a rating in this page’s structured data. How we pick.
How these were picked
We have not printed on these machines and we do not pretend to have. What we did was read each manufacturer’s own specification page, take their stated build volume, temperatures and speeds, check that every pick genuinely fits the job in this page’s title, confirm it is still being sold, and pull a live price rather than a remembered one. Every figure names the source it came from, so you can check it yourself in about a minute.
How we pick sets out the full method, including what would change a ranking.
Questions people actually ask
+−How much does one 3D print cost?
Divide the spool price by 1,000 and multiply by the grams your slicer reports. Most useful desk-sized objects are tens of grams, so the answer is usually a small fraction of the spool.
+−How many prints does a 1 kg spool make?
For a beginner printing useful desk-sized objects, commonly twenty to thirty. Small items like clips and hooks run into the dozens; a large decorative piece might use a third of a spool on its own.
+−Does higher infill use much more filament?
Yes, and it is where most beginners waste material. Going from fifteen percent to fifty roughly triples the plastic in the interior and adds hours. For strength, add a wall before you add infill — walls contribute more per gram.