Roundup
The Best 3D Printers for Cosplay
Nobody prints a helmet in one piece on a consumer machine. Once you accept that, the specification that actually matters stops being build volume and starts being what the plastic does after it comes off the plate.
By Scooter M. · Published · Last reviewed
How this page is funded: the buy links below are affiliate links. If you buy through one we earn a commission, at no extra cost to you. It does not change the order of the picks or a word of what we say about them. Full disclosure.
Printers we claim to have tested: 0. Everyone in this category says they tested twenty machines. We have not tested any, and we would rather say so. What we did instead is on this page: the manufacturer’s own published specification for every pick, cited and dated; the arithmetic on what it costs to run, with the inputs shown; a live price rather than a remembered one; and a plain answer on who should skip each machine.
The short answer
Get the Bambu Lab A1. 256 mm cubed is the size cosplay model files are already designed around, the 100 °C plate keeps long sections stuck down, and the automation means a twelve-hour piece is much less likely to fail overnight. Buy the Elegoo Centauri Carbon instead if you intend to sand, fill and prime in ABS, which is what most serious prop finishing assumes.
Cosplay is the use case where build volume gets over-weighted hardest, so we want to deal with that before the picks.
The sectioning reality
A human head is roughly 200 mm across before you add helmet clearance, ears, horns or a visor. No consumer printer on this page prints a wearable helmet in one piece, and the ones that could would cost more than the rest of your costume budget combined.
So every cosplay model you download is already cut into sections, with alignment pins or flat mating faces, designed to be glued. Once you accept that, the question changes. It is no longer “how big is the bed” but “how many sections, and how much work is each seam?”
Going from 180 mm to 256 mm cubed genuinely reduces the section count on most helmets — often from six pieces to four. Going beyond 256 mm helps less than you would expect, because the files are mostly cut for the 256 mm class that dominates the market.
How we picked
Five criteria, in the order they actually matter for prop work. Every figure is the manufacturer’s own published number and we have not printed on any of these machines.
1. Does it finish long prints reliably? A cosplay section is eight to twenty hours. A failure at hour fourteen costs a day and several hundred grams. Automatic bed leveling, flow calibration and filament run-out detection are worth more here than on any other use case.
2. Plate temperature. Large flat-bottomed sections are exactly the geometry that lifts at the corners. A 100 °C plate holds a big PETG or ABS part down where an 80 °C plate struggles.
3. Can it run the plastic you intend to finish in? This is where the enclosure question enters. ABS sands and solvent-welds beautifully, which is why prop makers still use it. It also needs a warm chamber — see PETG against ABS.
4. Build volume, third not first. Bigger is better here, but only up to the section sizes the files assume.
5. Cost per part. Cosplay eats filament by the kilogram, not the gram. A machine that runs any standard 1.75 mm spool from any brand matters more than one tied to a proprietary format.
Published figures, read from each manufacturer's own page on 2026-09-06.
| Machine | Build volume | Max plate | Enclosed? | ABS rated? |
|---|---|---|---|---|
| Bambu Lab A1 | 256 x 256 x 256 mm | 100 C | No | Not recommended |
| Elegoo Centauri Carbon | 256 x 256 x 256 mm | 110 C at 25 C ambient | Yes | Supported |
| Bambu Lab P2S | 256 x 256 x 256 mm | 110 C | Yes | Supported |
| Bambu Lab A1 mini | 180 x 180 x 180 mm | 80 C | No | Not recommended |
The material decision matters more than the machine
PLA prints easily, holds fine detail and sands badly — it gums up sandpaper as friction heats it. Fine for pieces you will not smooth much, and for anyone starting out.
PETG is tougher and survives a convention floor better, and it is even less pleasant to sand. Good for structural parts, armor plates that get knocked, and anything that must not shatter.
ABS is the finishing plastic. It sands properly and bonds with solvent, which means seams can genuinely disappear rather than being filled. That is the whole reason to want an enclosure for cosplay, and it is why two of our four picks have one.
If you are not sure where to start, start in PLA on whatever machine you buy. Our PLA picks are three mainstream spools; prop work will go through them quickly.
Do not buy for the biggest project you can imagine
The most expensive mistake in this category is buying a machine for a full suit of armor before printing a single bracer. Prop building has a high dropout rate, and the people who finish builds are almost always the ones who started with one small piece and enjoyed it.
Print a pauldron, a mask or a single gauntlet section first. It takes an evening, it costs a few dollars of filament, and it tells you honestly whether the sanding and filling part of this hobby is something you want to do repeatedly. If it is, the machine you bought to find out is still the right machine.
What the work actually is: sections and seams
A helmet arrives as four to eight STL files. Each prints separately, then they are glued, the seams are filled, the whole thing is sanded and primed, and only then painted. The printer is responsible for maybe a third of the elapsed time and almost none of the skill.
Alignment matters more than resolution. Good cosplay files include registration pins or keyed mating faces so the sections cannot be glued crooked. A print that is dimensionally accurate at the mating face saves an hour of filling; one that is 0.3 mm out costs you that hour. This is why automatic flow calibration earns its place here — consistent extrusion is what keeps a mating face true.
Seam placement is a slicer decision. Most slicers let you control where the layer-change seam falls. On a helmet, putting it on an edge that will be sanded anyway is free and saves work.
Plan the glue before the print. PLA and PETG bond with cyanoacrylate and epoxy; ABS can be solvent-welded, which genuinely fuses the parts rather than sticking them. That single difference is why so much prop work is still done in ABS despite everything easier about the alternatives.
Orientation and supports on prop parts
Cosplay geometry is curved shells, which is close to the worst case for supports if you orient it carelessly and close to the best case if you do not.
Print shells open-side down. A helmet section printed with its concave face on the plate usually needs almost no support. The same section flipped needs scaffolding through the whole interior.
Thin detail parts print flat. Horns, fins, vents and trim that stand proud of a surface are usually separate files for a reason. Print them flat and glue them on.
Supports leave marks. Every support touching a visible surface is sanding you signed up for. Rotating a part fifteen degrees to move supports onto a hidden face is the single highest-value skill in prop printing, and it costs nothing.
How much filament a prop actually takes
More than people budget for, and this is where the running cost of cosplay differs from ordinary printing.
A full-size helmet in sections, printed with a few perimeters and light infill, is commonly several hundred grams to over a kilogram depending on wall thickness and size. Armor sets run to multiple kilograms. That is a different order from the twenty-to-thirty desk-objects-per-spool arithmetic on how long a spool lasts.
Two consequences. First, buy filament by the multi-kilogram bundle rather than the single spool once you are committed to a build. Second, this is the use case where a machine locked to proprietary filament would be genuinely expensive — every pick here takes any standard 1.75 mm spool.
Printing armor versus printing a helmet
These are different problems and people conflate them. A helmet is one object in several sections, printed once, finished carefully. Armor is many objects, often in mirrored pairs, where consistency across parts matters more than perfection on any one of them.
For armor, the specification that starts mattering is unattended reliability rather than build volume, because you are running the machine for days on end. Filament run-out detection and power-loss recovery earn their place, and so does a printer you can leave alone overnight without worrying — which is an argument for the enclosed picks on this page as much as a materials one.
What about the really big machines?
They exist, and for cosplay they are the obvious temptation. Bambu Lab’s A2L publishes 330 × 320 × 325 mm, which is genuinely a different class of section size, and we cover it in the Bambu Lab lineup guide. Two honest caveats before you chase it: its published plate ceiling is 80 °C, the same as the little A1 mini, so it is a large PLA machine rather than a large ABS one; and it is not currently listed on Amazon, so the buy button on this site would send you to a search rather than a listing.
For most people the section count saved does not justify either compromise. Print in four pieces on a 256 mm machine and spend the difference on filament.
The finishing kit, and why it matters more than the printer
A printed prop straight off the plate looks printed. Everything that makes it look made happens afterward, and the budget for that is consistently underestimated.
Glue. Cyanoacrylate with an accelerator for PLA and PETG; solvent cement if you are working in ABS. Whichever you use, dry fit every section before any of it is permanent.
Filler. Automotive body filler or a spot putty for seams and layer lines. This is the step that consumes the most time and the most patience, and no printer specification shortens it.
Sandpaper, in grades. Coarse to knock down seams, then progressively finer. Wet sanding keeps the dust down and stops PLA gumming, which it will otherwise do as friction heats it.
Filler primer. A high-build primer fills the fine layer texture that sanding alone leaves. Two or three coats with light sanding between them is what turns a printed surface into a smooth one.
Paint, last. By the time you are painting, the shape of the finished piece was decided several steps earlier.
The honest summary: on a full helmet, printing is one evening of setup and several days of unattended machine time, and finishing is many hours of your own. If you are deciding between a more expensive printer and a properly stocked finishing bench, buy the bench.
Before you buy
Download the model first. Look at how the designer sectioned it and what bed size they assumed — the model libraries usually say. Buying a printer for a specific project and discovering the files were cut for a different bed is an avoidable annoyance.
And budget for the time, not just the machine. A full helmet is days of printing before any finishing. How long a 3D print takes sets out what actually drives that.
Quick picks
Ranked on how well each one fits the job in this page's title, read off the manufacturer's own published specifications. Tap any row for the full write-up, including who should skip it.
| # | Product | Best for | Beginner fit | Price |
|---|---|---|---|---|
| 1 | 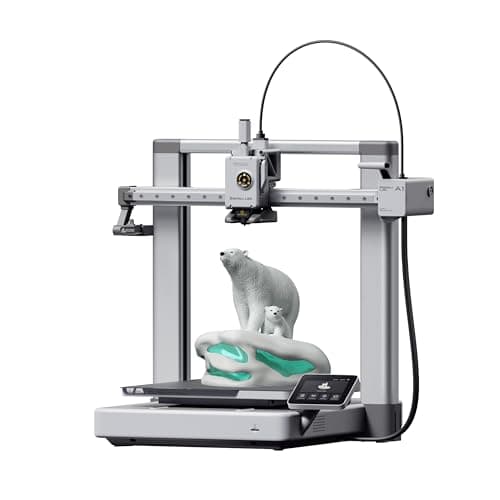 Bambu Lab A1256 x 256 x 256 mm Bambu Lab A1256 x 256 x 256 mm | Best overall for cosplay | 9.0 | $299.99 - Check price on Amazon |
| 2 | 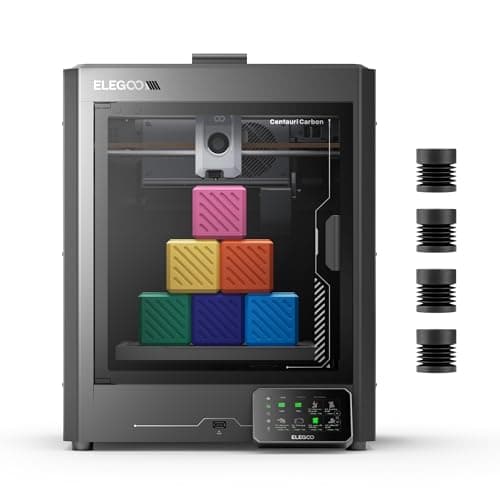 Elegoo Centauri Carbon256 x 256 x 256 mm Elegoo Centauri Carbon256 x 256 x 256 mm | Best if you want to sand and fill | 8.3 | $298.99 - Check price on Amazon |
| 3 | 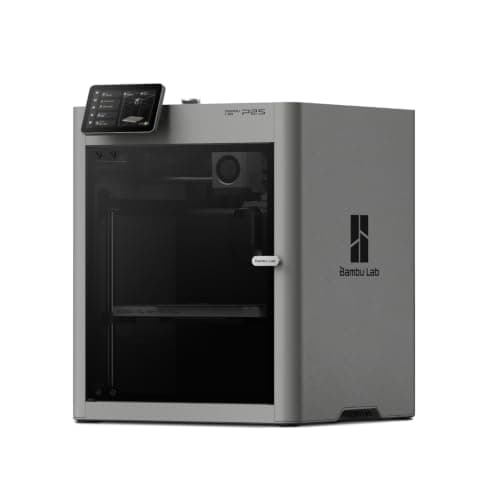 Bambu Lab P2S256 x 256 x 256 mm Bambu Lab P2S256 x 256 x 256 mm | Best for long unattended sections | 8.5 | $569.00 - Check price on Amazon |
| 4 | 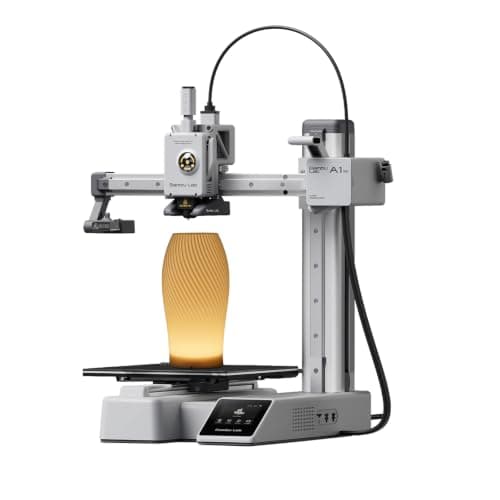 Bambu Lab A1 mini180 x 180 x 180 mm Bambu Lab A1 mini180 x 180 x 180 mm | Best cheap way to start | 9.2 | $249.00 - Check price on Amazon |
#1 · Best overall for cosplay
Bambu Lab A1
Bambu Lab · A first printer you will not outgrow
The A1 mini's larger sibling, and the better buy the moment you have a specific large thing in mind. Same self-calibration, 256 mm cubed instead of 180, and a 100 C bed rather than 80 C — which is the spec that actually widens what you can print.
#ad Price as of September 14, 2026, from Amazon. Prices change. How we make money.
What it actually is
The full-size version of the A1: same open-frame layout, same automatic calibration, a bigger bed and a hotter one. The extra bed temperature matters because materials that shrink as they cool need a warm plate to stay stuck to it.
Does it fit this page?
256 mm cubed and a 100 C plate at an entry-level price, with the automation that keeps a twelve-hour section from failing at hour nine. Most helmet sections are designed around a 256 mm bed, so this is the size the model files already assume.
What the manufacturer states
| Figure | Value | Source |
|---|---|---|
| Build volume | 256 x 256 x 256 mm | Bambu Lab A1 technical specifications |
| Max hot end temperature | 300 C | Bambu Lab A1 technical specifications |
| Max build plate temperature | 100 C | Bambu Lab A1 technical specifications |
| Max toolhead speed | 500 mm/s | Bambu Lab A1 technical specifications |
| Max toolhead acceleration | 10,000 mm/s2 | Bambu Lab A1 technical specifications |
| Filaments rated ideal | PLA, PETG, TPU, PVA | Bambu Lab A1 technical specifications |
| Machine dimensions | 465 x 410 x 430 mm | Bambu Lab A1 technical specifications |
| Net weight | 8.3 kg | Bambu Lab A1 technical specifications |
| Max power | 350 W at 110 V | Bambu Lab A1 technical specifications |
Read from Bambu Lab, A1 technical specifications on 2026-09-01. Where a manufacturer does not publish a figure, there is no row for it here.
What is good about it
- 256 mm cubed covers almost everything a first-year printer is asked to make
- 100 C bed rather than the mini's 80 C, which is the difference that makes larger PETG parts stick
- Identical hands-off calibration to the A1 mini, so nothing gets harder as the machine gets bigger
- Bambu Lab publishes a full specification sheet, so every number on this page is checkable in a minute
What is not
- 465 mm wide and 8.3 kg — it needs a dedicated shelf, not a corner of a desk
- 350 W at US voltage against the mini's 150 W, so it costs meaningfully more to run
- Still open-frame, so the material limits are the same as the mini's despite the hotter bed
- Multi-color is again a separate AMS lite purchase
Skip this one if
Skip it if your desk is the only place it can go and you have not measured that desk. It is nearly half a meter wide. If you are unsure whether you will use the extra volume, the mini is the cheaper mistake.
What we cannot tell you
We have not printed on this machine. Noise at full speed, long-term belt and rod wear, and how often the auto-calibration actually needs intervention are all beyond what a specification sheet can tell you.
How it scored for a beginner
- Setup out of the box9.5
- Auto-calibration10.0
- First-layer forgiveness9.5
- Parts and filament availability9.0
- Running cost8.0
- Help when it goes wrong9.0
Beginner fit 9.0 / 10. That is our editorial read of how well this suits someone buying their first printer, taken off the published specifications — not a test result, and not a verdict on absolute quality. It is deliberately not marked up as a rating in this page’s structured data. How we pick.
#2 · Best if you want to sand and fill
Elegoo Centauri Carbon
Elegoo · An enclosed printer without an enclosed-printer budget
An enclosed CoreXY printer at a price that used to buy an open frame. If the reason you are hesitating about a beginner machine is that you can already see yourself outgrowing it, this is the one that answers that.
#ad Price as of September 14, 2026, from Amazon. Prices change. How we make money.
What it actually is
A boxed CoreXY machine with a steel chassis and aluminum and glass panels. The enclosure holds chamber heat, which is what lets it handle materials that shrink and peel on an open frame.
Does it fit this page?
The enclosure is what makes ABS realistic, and ABS is the prop-maker's plastic because it sands and solvent-welds in a way PLA and PETG resist. Elegoo also publishes the highest nozzle and plate ceilings here, at a price that competes with open-frame machines.
What the manufacturer states
| Figure | Value | Source |
|---|---|---|
| Build volume | 256 x 256 x 256 mm | Elegoo Centauri Carbon product specifications |
| Motion system | CoreXY | Elegoo Centauri Carbon product specifications |
| Enclosure | Fully enclosed; steel chassis with aluminum and glass shell | Elegoo Centauri Carbon product specifications |
| Maximum speed | 500 mm/s | Elegoo Centauri Carbon product specifications |
| Maximum acceleration | 20,000 mm/s2 (10,000 mm/s2 default) | Elegoo Centauri Carbon product specifications |
| Max nozzle temperature | 320 C | Elegoo Centauri Carbon product specifications |
| Max heated bed temperature | 110 C at 25 C ambient | Elegoo Centauri Carbon product specifications |
| Supported filament | PLA, PETG, ABS, ASA, TPU, PET, PC, PA and carbon or glass fiber reinforced grades | Elegoo Centauri Carbon product specifications |
| Bed leveling | 121-point auto-leveling; full-auto calibration | Elegoo Centauri Carbon product specifications |
| Print accuracy | +/- 0.1 mm | Elegoo Centauri Carbon product specifications |
| Machine size and weight | 398 x 404 x 490 mm, 17.5 kg | Elegoo Centauri Carbon product specifications |
| Rated power | 350 W at 110 V | Elegoo Centauri Carbon product specifications |
| Operating sound | 55 dB or below | Elegoo Centauri Carbon product specifications |
Read from Elegoo, Centauri Carbon product page on 2026-09-06. Where a manufacturer does not publish a figure, there is no row for it here.
What is good about it
- Fully enclosed at a price that competes with open-frame machines
- 20,000 mm/s2 rated acceleration, matching the enclosed Bambu
- 256 mm cubed — the same working envelope as an A1 or a P1S
- The enclosure contains noise and smell, which decides whether a printer can live in a bedroom
What is not
- A newer platform than the Bambu and Creality lines, so there is less community troubleshooting behind it
- An enclosure adds a heat-soak wait to PLA prints in a warm room
- Larger and heavier than any open-frame machine here
- Nothing about the enclosure makes the first print easier — it makes later prints possible
Skip this one if
Skip it if PLA is all you will ever print and your printer lives in a spare room. You are paying for a box you will not use. The enclosure earns its money on ABS, ASA and a shared living space, not on PLA in a garage.
What we cannot tell you
We have not printed on this machine. Chamber temperature in practice, panel fit and finish, and long-term CoreXY belt tension are not published numbers.
How it scored for a beginner
- Setup out of the box8.5
- Auto-calibration8.5
- First-layer forgiveness8.5
- Parts and filament availability7.5
- Running cost8.0
- Help when it goes wrong7.5
Beginner fit 8.3 / 10. That is our editorial read of how well this suits someone buying their first printer, taken off the published specifications — not a test result, and not a verdict on absolute quality. It is deliberately not marked up as a rating in this page’s structured data. How we pick.
#3 · Best for long unattended sections
Bambu Lab P2S
Bambu Lab · An enclosed printer bought to keep, not to learn on
The P1S rebuilt: the same 256 mm cubed enclosed box, a hotter plate, a faster head and a cooling system that draws outside air so the door can stay shut on PLA. It is the enclosed Bambu to buy if you are buying one to keep, and it is still more machine than a first month needs.
#ad Price as of September 14, 2026, from Amazon. Prices change. How we make money.
What it actually is
An enclosed CoreXY printer — the head moves in two axes while the plate only rises, and a box surrounds the whole thing. The box holds heat, which is what keeps plastics that shrink as they cool stuck to the plate, and it holds most of the noise and smell as well.
Does it fit this page?
A 110 C plate and a rated 40 mm3/s flow, plus a filter rated for VOC and particulate filtration - which matters because prop work means printing ABS repeatedly in whatever room you have. The airflow system also means the door stays shut for the PLA sections.
What the manufacturer states
| Figure | Value | Source |
|---|---|---|
| Build volume | 256 x 256 x 256 mm | Bambu Lab P2S technical specifications |
| Enclosure | Enclosed; plastic and glass outer frame, plastic and steel chassis | Bambu Lab P2S technical specifications |
| Max nozzle temperature | 300 C | Bambu Lab P2S technical specifications |
| Max heatbed temperature | 110 C | Bambu Lab P2S technical specifications |
| Max toolhead speed | 600 mm/s | Bambu Lab P2S technical specifications |
| Max toolhead acceleration | 20,000 mm/s2 | Bambu Lab P2S technical specifications |
| Max hot end flow | 40 mm3/s | Bambu Lab P2S technical specifications |
| Nozzle | Hardened steel, 0.4 mm included; 0.2, 0.6 and 0.8 mm supported | Bambu Lab P2S technical specifications |
| Filaments supported | PLA, PETG, ABS, ASA, TPU, PET, PA, PC, PVA and carbon or glass fiber reinforced grades | Bambu Lab P2S technical specifications |
| Filtration | Activated carbon; VOC and particulate filtration supported | Bambu Lab P2S technical specifications |
| Physical dimensions | 392 x 406 x 478 mm | Bambu Lab P2S technical specifications |
| Net weight | 14.9 kg | Bambu Lab P2S technical specifications |
| Max power | 1000 W at 110 V | Bambu Lab P2S technical specifications |
Read from Bambu Lab, P2S technical specifications on 2026-09-04. Where a manufacturer does not publish a figure, there is no row for it here.
What is good about it
- Enclosed, with an activated carbon filter Bambu Lab rates for VOC and particulate filtration — the version of ABS printing that belongs in a room you sit in
- The Adaptive Airflow System draws cool air from outside the chamber, so Bambu Lab states low-temperature filaments can be printed with the door closed
- A 110 C plate against the P1S's 100 C and a rated 40 mm3/s flow, so large parts in engineering plastics are less of a gamble
- Auto bed leveling, nozzle offset and flow calibration are all documented and automatic, so nothing about setup is harder than an A1's
What is not
- It is the most expensive machine on this site's beginner shortlist, and every advantage it holds is aimed at materials a first year does not reach
- 1000 W at 110 V while the plate heats — several times the draw of an A1 mini, and worth knowing before it shares a circuit with a space heater
- 14.9 kg and 478 mm tall, so it is a shelf machine rather than a desk machine
- Multi-color still means buying the AMS 2 Pro, so the headline price is not the multi-color price
Skip this one if
Skip it if you have not yet printed anything. The P2S is a better machine than an A1 in every measurable way and not a better first machine, because almost none of what it adds shows up in PLA. Buy it when a project names ABS, ASA or a fiber-filled filament out loud.
What we cannot tell you
We have not printed on this machine. How quiet it really is with the door shut, whether the carbon filter meaningfully changes the smell of ABS in a small room, and how the servo extruder holds up over a year are not answerable from a specification sheet.
How it scored for a beginner
- Setup out of the box8.5
- Auto-calibration9.5
- First-layer forgiveness9.0
- Parts and filament availability9.0
- Running cost6.5
- Help when it goes wrong9.0
Beginner fit 8.5 / 10. That is our editorial read of how well this suits someone buying their first printer, taken off the published specifications — not a test result, and not a verdict on absolute quality. It is deliberately not marked up as a rating in this page’s structured data. How we pick.
#4 · Best cheap way to start
Bambu Lab A1 mini
Bambu Lab · A genuine first printer
The one to get if you have never done this before. It calibrates itself before every print — bed mesh, Z-offset, flow, resonance — so the part of 3D printing that used to defeat beginners is a step you never see. The build volume is the price you pay.
#ad Price as of September 14, 2026, from Amazon. Prices change. How we make money.
What it actually is
A small open-frame filament printer. Filament is a 1.75 mm plastic string on a spool; the machine melts it and draws your object one layer at a time. Open-frame means there is no box around it, which is fine for PLA and a limitation for materials that warp.
Does it fit this page?
180 mm cubed is small for props and it is not nothing - pauldrons, greebles, bracers and detail parts all fit. If you are not yet sure cosplay printing is for you, this is the least expensive way to find out without buying a machine you regret.
What the manufacturer states
| Figure | Value | Source |
|---|---|---|
| Build volume | 180 x 180 x 180 mm | Bambu Lab A1 mini technical specifications |
| Max hot end temperature | 300 C | Bambu Lab A1 mini technical specifications |
| Max build plate temperature | 80 C | Bambu Lab A1 mini technical specifications |
| Max toolhead speed | 500 mm/s | Bambu Lab A1 mini technical specifications |
| Max toolhead acceleration | 10,000 mm/s2 | Bambu Lab A1 mini technical specifications |
| Filaments rated ideal | PLA, PETG, TPU, PVA | Bambu Lab A1 mini technical specifications |
| Filaments not recommended | ABS, ASA, PC, PA, PET, carbon/glass fiber reinforced | Bambu Lab A1 mini technical specifications |
| Machine dimensions | 347 x 315 x 365 mm | Bambu Lab A1 mini technical specifications |
| Net weight | 5.5 kg | Bambu Lab A1 mini technical specifications |
| Max power | 150 W | Bambu Lab A1 mini technical specifications |
Read from Bambu Lab, A1 mini technical specifications on 2026-09-01. Where a manufacturer does not publish a figure, there is no row for it here.
What is good about it
- Full auto-calibration on every print, per Bambu Lab's own specification — no paper-under-the-nozzle ritual
- Rated ideal for PLA, PETG, TPU and PVA, which covers everything a beginner should print in year one
- 150 W maximum power draw is the lowest of any printer on this site, so running cost is trivial
- 5.5 kg and 347 mm wide — it fits on a desk without rearranging the room
What is not
- 180 mm cubed is genuinely small. A full-size helmet or a large cosplay prop will not fit
- Bambu Lab rates ABS, ASA, PC and fiber-reinforced filaments as not recommended on this machine
- The multi-color AMS lite is a separate purchase, so the headline price is not the multi-color price
- Bambu Lab's own Amazon store lists this machine bundled with an LED lamp kit rather than on its own, so the price on our button is for that bundle. The bare printer is sold direct on Bambu Lab's store
- Open frame, so it is at the mercy of a draft from a window or an air conditioning vent
Skip this one if
Skip it if you already know the thing you want to print is bigger than a shoebox, or if you specifically want ABS or a carbon-fiber-filled filament. Bambu Lab itself lists those materials as not recommended here, and buying a machine you intend to use outside its rated envelope is how a first printer becomes a frustrating one.
What we cannot tell you
We have not printed on this machine. Long-term reliability, real-world noise in a quiet room, and how the textured plate holds up after a year are all things we cannot honestly report without owning one.
How it scored for a beginner
- Setup out of the box9.5
- Auto-calibration10.0
- First-layer forgiveness9.5
- Parts and filament availability9.0
- Running cost10.0
- Help when it goes wrong9.0
Beginner fit 9.2 / 10. That is our editorial read of how well this suits someone buying their first printer, taken off the published specifications — not a test result, and not a verdict on absolute quality. It is deliberately not marked up as a rating in this page’s structured data. How we pick.
How these were picked
We have not printed on these machines and we do not pretend to have. What we did was read each manufacturer’s own specification page, take their stated build volume, temperatures and speeds, check that every pick genuinely fits the job in this page’s title, confirm it is still being sold, and pull a live price rather than a remembered one. Every figure names the source it came from, so you can check it yourself in about a minute.
How we pick sets out the full method, including what would change a ranking.
Questions people actually ask
+−What size 3D printer do I need for cosplay?
256 mm cubed is the practical sweet spot, because that is the bed size most cosplay model files are sectioned for. No consumer printer prints a wearable helmet in one piece, so the realistic goal is fewer sections rather than none.
+−What filament is best for cosplay props?
PLA to start, PETG for parts that get knocked, and ABS if you intend to sand and solvent-weld seams to invisibility. ABS is the prop-maker’s plastic for finishing reasons, and it needs an enclosed printer.
+−Do I need an enclosed printer for cosplay?
Only if you want to work in ABS or ASA. If you will print in PLA and PETG and do your smoothing with filler and primer, an open-frame machine like the Bambu Lab A1 is the better value.
+−Can a Bambu A1 mini do cosplay?
For detail parts, bracers, pauldrons and greebles, yes. For helmets and large armor it means many more sections and many more seams to hide. It is a reasonable way to find out whether you enjoy prop printing before spending more.