Guide
Are 3D Printers Hard to Use?
They used to be, genuinely, and most of what you will read about them was written when that was true. Here is what actually changed, what did not, and how to tell which kind of machine you are looking at.
By Scooter M. · Published · Last reviewed
How this page is funded: the buy links below are affiliate links. If you buy through one we earn a commission, at no extra cost to you. It does not change the order of the picks or a word of what we say about them. Full disclosure.
Printers we claim to have tested: 0. Everyone in this category says they tested twenty machines. We have not tested any, and we would rather say so. What we did instead is on this page: the manufacturer’s own published specification for every pick, cited and dated; the arithmetic on what it costs to run, with the inputs shown; a live price rather than a remembered one; and a plain answer on who should skip each machine.
The short answer
No, if you buy a printer that calibrates itself. Yes, if you buy one that does not. That single distinction explains almost every contradictory answer you will find. A current machine with automatic bed leveling, Z-offset probing and flow calibration is roughly as hard to operate as a home printer. A machine without those is a hobby in itself.
This is the question people ask just before buying, and it is badly served because the honest answer changed within the last few years while most of the internet’s opinions did not.
What used to be hard, and is not any more
Three steps historically ended people’s interest. All three are now automated on the machines we recommend.
Leveling the bed. The old procedure was a sheet of paper, four thumbwheels and a lot of judgement about friction. Do it slightly wrong and every print failed. Bambu Lab publishes automatic bed leveling with no manual adjustment on the A1 series, and Creality publishes CR Touch automatic leveling on the current Enders.
Setting the Z-offset. How far the nozzle sits from the plate, measured by trial and error over an evening. Bambu Lab probes the bed with the nozzle to measure it absolutely; Creality uses a strain sensor. If those terms are new, our bed leveling and Z-offset page explains both in plain language — but on a current machine you will not have to touch either.
Calibrating flow. How much plastic actually comes out versus how much the slicer thinks. Now measured automatically before the print on the machines here.
Remove those three and you have removed the entire historical failure mode of this hobby. That is not marketing; it is why the honest answer to this question is different in 2026 than it was in 2019.
What is still genuinely hard
We would be doing you no favors by stopping there. Four things remain.
The first week has a learning curve. Not a technical one so much as a judgement one: knowing what a good first layer looks like, which models need supports, when a print is going wrong early enough to cancel it. That is experience, and nothing automates it. Our beginner mistakes page exists to shorten it.
Filament goes wet, and it does not announce itself. A spool that printed perfectly a month ago starts popping, stringing and producing rough surfaces. Almost everybody diagnoses this as the printer breaking. It is moisture, and it is the single most misattributed problem in the hobby — storage and drying covers it.
Things do still fail. A print comes unstuck at hour six, a nozzle clogs, a spool tangles. Modern machines fail far less often; they do not fail never. The fixes are ordered and cheap — bed adhesion and a clogged nozzle are the two you will meet first.
Designing your own models is a separate skill. Printing somebody else’s file is easy. Making your own is CAD, and that is a genuine hobby with its own learning curve. You do not need it — the model libraries hold millions of free files — but nobody should tell you the two skills are the same.
What a first evening actually looks like
On a current auto-calibrating machine: roughly ten to fifteen minutes from box to first print. Unpack, remove the shipping screws, load filament, pick the sample model on the screen, press print. The machine runs its own calibration before it starts.
On a machine that needs assembling, such as the Ender-3 V3 SE: budget an evening. It is not difficult work — bolts and cable routing — and for some people it is the appealing part.
After the sample model, the honest sequence is one small useful object, then a slightly harder one. A list sized for exactly this is on what to 3D print first.
Published setup automation, read from each manufacturer's own page on 2026-09-01.
| Machine | Assembly | Bed leveling | Z-offset | Flow |
|---|---|---|---|---|
| Bambu Lab A1 mini | None | Automatic | Automatic, nozzle-probed | Automatic |
| Creality Ender-3 V3 SE | An evening | CR Touch, automatic | Automatic, strain sensor | Not published |
| An older Ender-3 or similar | Several hours | Manual, four thumbwheels | Manual, by trial | Manual |
That third row is the machine most of the “3D printing is hard” advice on the internet was written about. If you buy a second-hand printer of that generation to save money, you are buying that experience along with it — which is the main reason we suggest not starting there.
The five things that go wrong in week one, ranked by difficulty
Rather than argue about whether printing is hard in the abstract, here is what actually happens and how hard each one is to deal with.
1. The print does not stick. (Easy.) The most common first-week failure and almost always a dirty plate. Fingerprints leave grease, grease stops adhesion. Wash the plate with dish soap and warm water before changing any setting. The ordered fix list is on prints not sticking to the bed.
2. Fine hairs between parts. (Easy.) Cosmetic, brushes off, and almost always moisture rather than a setting. Dry the spool before touching retraction — see stringing.
3. Nothing comes out of the nozzle. (Medium.) Looks alarming, usually is not. Check the first-layer height, check whether the filament is wet, then do a cold pull. The order matters and it is on the clogged nozzle page.
4. The model needed supports and did not have them. (Medium.) A judgement problem rather than a technical one. Overhangs beyond roughly 45 degrees need scaffolding, and learning to see that in a thumbnail takes a few weeks. Easy first prints is about picking models that dodge the issue while you learn.
5. A part warps or splits after printing. (Harder.) Usually the wrong material for the job rather than a machine fault — PLA in a hot car, or a load-bearing part in something brittle. The fix is a materials decision, which is what PLA against PETG and PLA against PLA+ are for.
What maintenance actually involves
Less than people expect on a current machine, and it is worth saying concretely because “maintenance” sounds heavier than it is.
Every few prints: wipe the build plate. That is the whole routine, and skipping it causes most adhesion problems.
Every month or so: look at the machine. Dust on a hot end cooling fan is a real cause of mid-print failures, and it is visible if you glance.
Occasionally: clear a clogged nozzle, or replace one. Nozzles are consumable and cheap. Printing abrasive filament wears them out much faster than PLA does.
Not at all, on a current machine: re-leveling the bed by hand. That was the recurring chore that made the old machines feel like work, and it is the one automation genuinely removed.
How long until it feels routine
Our honest estimate, based on what the failure modes above actually take to learn: a few hours to get a first print, two or three weeks of regular use before you stop thinking about the machine and start thinking about the object, and a couple of months before you can look at a model and predict how it will print.
Designing your own parts is a separate timeline entirely and an optional one. Plenty of people print for years without ever opening a CAD program, and there is nothing second-rate about that.
Who genuinely finds it hard
Two groups, and it is worth knowing if you are in one.
People who wanted one specific object. If you need a single part made once, a printing service will do it better and cheaper, and you will have spent a weekend learning a hobby you did not want. The full version of that argument is on is a 3D printer worth it.
People who bought the wrong machine for their temperament. Somebody who wants objects and bought a machine that wants tuning will be frustrated; so will somebody who wanted to tinker and bought a sealed appliance. That is a matching problem, not a difficulty one, and Bambu Lab against Creality is written around exactly that choice.
What about the software?
Slicing sounds like the technical step and is the least of it. A slicer turns a downloaded model into instructions for your specific printer, and every machine here ships with one that already has a tuned profile for itself. For a first month the honest workflow is: open the model, pick the printer profile that is already there, press slice, send.
The settings worth understanding come later and there are only three that matter early: layer height, infill and supports. All three are on how long a 3D print takes, because they are the same three that decide print time.
Resin is a different answer
Everything above is about filament printing, which is what most people mean. Resin printing is genuinely harder, and it is worth knowing why before somebody tells you 3D printing is easy and you buy the wrong kind of machine.
A resin printer resolves detail no nozzle can reach, which is why it owns the miniatures category. What it adds is chemistry: liquid resin that you handle with gloves, ventilation because of the fumes, an isopropyl alcohol wash for every finished part, a UV curing step after that, and a disposal obligation for the used resin and alcohol.
None of that is difficult in the sense of requiring skill. It is difficult in the sense of being a routine you cannot skip, every single print, forever. That is a different kind of hard from the filament questions on this page, and it is the reason our answer to “which should I start with” is filament unless the honest answer to “what will you print” is already “miniatures.”
The full comparison, including what each is genuinely better at, is on FDM against resin, and the machines are on the miniatures roundup.
The honest one-line answer
3D printing is now about as hard as owning a decent home printer that occasionally jams, plus a first fortnight of learning what a good first layer looks like. That is a real cost and a much smaller one than the internet’s reputation for this hobby suggests, and it is almost entirely a function of which machine you buy rather than how technical you are.
So what should you buy?
If the answer to this question decides your purchase: buy the machine that automates the most. The Bambu Lab A1 mini is our pick for exactly that reason — it removes all three historical failure points and it is the cheapest machine that does.
If you would enjoy understanding the machine, the Creality Ender-3 V3 SE costs less, still automates leveling and Z-offset, and gives you something to build. The wider shortlist is on the beginner roundup.
What we would buy for this
Chosen from the same registry as our roundups, on the manufacturer’s own published figures and a live price.
Bambu Lab A1 mini
Bambu Lab · A genuine first printer
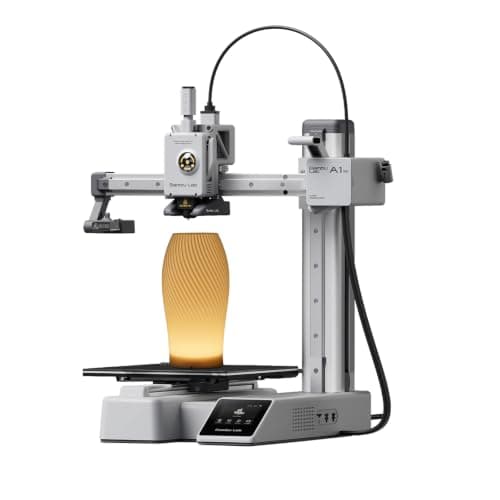
The one to get if you have never done this before. It calibrates itself before every print — bed mesh, Z-offset, flow, resonance — so the part of 3D printing that used to defeat beginners is a step you never see. The build volume is the price you pay.
#ad Price as of September 14, 2026, from Amazon. Prices change. How we make money.
What it actually is
A small open-frame filament printer. Filament is a 1.75 mm plastic string on a spool; the machine melts it and draws your object one layer at a time. Open-frame means there is no box around it, which is fine for PLA and a limitation for materials that warp.
What the manufacturer states
| Figure | Value | Source |
|---|---|---|
| Build volume | 180 x 180 x 180 mm | Bambu Lab A1 mini technical specifications |
| Max hot end temperature | 300 C | Bambu Lab A1 mini technical specifications |
| Max build plate temperature | 80 C | Bambu Lab A1 mini technical specifications |
| Max toolhead speed | 500 mm/s | Bambu Lab A1 mini technical specifications |
| Max toolhead acceleration | 10,000 mm/s2 | Bambu Lab A1 mini technical specifications |
| Filaments rated ideal | PLA, PETG, TPU, PVA | Bambu Lab A1 mini technical specifications |
| Filaments not recommended | ABS, ASA, PC, PA, PET, carbon/glass fiber reinforced | Bambu Lab A1 mini technical specifications |
| Machine dimensions | 347 x 315 x 365 mm | Bambu Lab A1 mini technical specifications |
| Net weight | 5.5 kg | Bambu Lab A1 mini technical specifications |
| Max power | 150 W | Bambu Lab A1 mini technical specifications |
Read from Bambu Lab, A1 mini technical specifications on 2026-09-01. Where a manufacturer does not publish a figure, there is no row for it here.
What is good about it
- Full auto-calibration on every print, per Bambu Lab's own specification — no paper-under-the-nozzle ritual
- Rated ideal for PLA, PETG, TPU and PVA, which covers everything a beginner should print in year one
- 150 W maximum power draw is the lowest of any printer on this site, so running cost is trivial
- 5.5 kg and 347 mm wide — it fits on a desk without rearranging the room
What is not
- 180 mm cubed is genuinely small. A full-size helmet or a large cosplay prop will not fit
- Bambu Lab rates ABS, ASA, PC and fiber-reinforced filaments as not recommended on this machine
- The multi-color AMS lite is a separate purchase, so the headline price is not the multi-color price
- Bambu Lab's own Amazon store lists this machine bundled with an LED lamp kit rather than on its own, so the price on our button is for that bundle. The bare printer is sold direct on Bambu Lab's store
- Open frame, so it is at the mercy of a draft from a window or an air conditioning vent
Skip this one if
Skip it if you already know the thing you want to print is bigger than a shoebox, or if you specifically want ABS or a carbon-fiber-filled filament. Bambu Lab itself lists those materials as not recommended here, and buying a machine you intend to use outside its rated envelope is how a first printer becomes a frustrating one.
What we cannot tell you
We have not printed on this machine. Long-term reliability, real-world noise in a quiet room, and how the textured plate holds up after a year are all things we cannot honestly report without owning one.
How it scored for a beginner
- Setup out of the box9.5
- Auto-calibration10.0
- First-layer forgiveness9.5
- Parts and filament availability9.0
- Running cost10.0
- Help when it goes wrong9.0
Beginner fit 9.2 / 10. That is our editorial read of how well this suits someone buying their first printer, taken off the published specifications — not a test result, and not a verdict on absolute quality. It is deliberately not marked up as a rating in this page’s structured data. How we pick.
Creality Ender-3 V3 SE
Creality · The smallest sensible amount of money
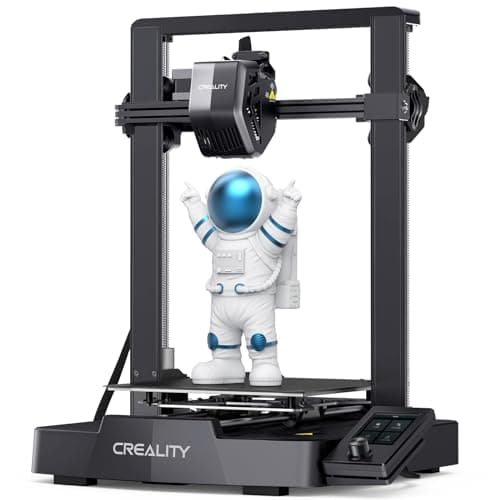
The cheap way in, and a genuinely modern one: auto bed leveling with CR Touch, automatic Z-offset from a strain sensor, and a direct-drive extruder. You will still learn more about your printer than an A1 owner does. Whether that is a feature or a cost is the whole decision.
#ad Price as of September 14, 2026, from Amazon. Prices change. How we make money.
What it actually is
An open-frame bed-slinger — the plate moves back and forth under a head that moves side to side and up. It is the classic hobby-printer layout, and this generation added the automatic setup steps the older Enders famously lacked.
What the manufacturer states
| Figure | Value | Source |
|---|---|---|
| Build volume | 220 x 220 x 250 mm | Creality Ender-3 V3 SE product specifications |
| Maximum print speed | 250 mm/s | Creality Ender-3 V3 SE product specifications |
| Typical print speed | 180 mm/s | Creality Ender-3 V3 SE product specifications |
| Acceleration | 2,500 mm/s2 | Creality Ender-3 V3 SE product specifications |
| Leveling | CR Touch auto leveling with strain-sensor Z-offset | Creality Ender-3 V3 SE product specifications |
| Extruder | Sprite direct extruder | Creality Ender-3 V3 SE product specifications |
| Filament diameter | 1.75 mm | Creality Ender-3 V3 SE product specifications |
Read from Creality, Ender-3 V3 SE product page on 2026-09-01. Where a manufacturer does not publish a figure, there is no row for it here.
What is good about it
- 220 x 220 x 250 mm is larger in every axis than the A1 mini
- Automatic bed leveling and Z-offset, which is the thing older Enders did not have
- The largest parts and community ecozystem of any machine here, by a distance
- Some assembly is required, and you will understand your printer better for it
What is not
- 250 mm/s maximum and 2,500 mm/s2 acceleration — a fraction of the A1's rated figures
- Not fully assembled out of the box, so first-print day is longer
- No filament run-out safety net of the kind Bambu specifies on the A1 series
- More of the tuning is yours to do, which is the trade for the price
Skip this one if
Skip it if the reason you are buying a printer is that you want to print things, not to own a printer. This machine is excellent value and it will ask more of you than an A1 mini will. If your patience for troubleshooting is low, spend the difference.
What we cannot tell you
We have not printed on this machine. How often the auto leveling needs re-running, the quality of the bundled build surface after a hundred prints, and assembly time for someone who has never built one are all outside what the specification tells you.
How it scored for a beginner
- Setup out of the box7.0
- Auto-calibration8.0
- First-layer forgiveness7.5
- Parts and filament availability10.0
- Running cost9.0
- Help when it goes wrong10.0
Beginner fit 8.0 / 10. That is our editorial read of how well this suits someone buying their first printer, taken off the published specifications — not a test result, and not a verdict on absolute quality. It is deliberately not marked up as a rating in this page’s structured data. How we pick.
How these were picked
We have not printed on these machines and we do not pretend to have. What we did was read each manufacturer’s own specification page, take their stated build volume, temperatures and speeds, check that every pick genuinely fits the job in this page’s title, confirm it is still being sold, and pull a live price rather than a remembered one. Every figure names the source it came from, so you can check it yourself in about a minute.
How we pick sets out the full method, including what would change a ranking.
Questions people actually ask
+−Are 3D printers hard to use for beginners?
Not on a current machine that calibrates itself. Automatic bed leveling, Z-offset probing and flow calibration removed the three steps that historically caused most first-month failures. A printer without those is genuinely harder, and most “3D printing is difficult” advice was written about that older kind.
+−How long does it take to learn 3D printing?
You can print a downloaded model on day one. Getting a reliable feel for what will print well, when to use supports and how to spot a failing print early takes a few weeks of regular use. Designing your own models is a separate skill and takes considerably longer.
+−Do you need to know CAD to use a 3D printer?
No. The model libraries hold millions of free, ready-to-print files, and most owners never design anything themselves. CAD is an optional second hobby rather than a requirement.
+−What is the hardest part of 3D printing?
Diagnosing problems that look like machine faults and are not. Wet filament is the biggest one — it produces popping, stringing and rough surfaces that people reliably blame on the printer. Keeping filament sealed prevents most of it.
+−Is 3D printing hard to maintain?
Light. Keep the build plate clean, keep filament dry, and clear a clogged nozzle occasionally. Current machines do not need the routine manual re-leveling that older ones did.